Why Gym Floor Restoration Demands a Professional Touch
Understanding the Wear on a Hardwood Gym Floor
Walk into any active gym after a few years of use and you will see it. Scuff marks near the free weights area. A dull, foggy finish where the cardio machines sit. Maybe a few loose boards near the entrance where foot traffic is heaviest. A polyurethane finish that once looked like glass now shows scratches, dents, and patches where the surface has worn through to the raw wood. This is not just cosmetic. When the finish breaks down, moisture from sweat and cleaning fluids can reach the hardwood flooring underneath, causing swelling, cupping, and even mould in the subfloor.
Gym floor restoration is not a weekend DIY project. It requires understanding how different types of wood react to impact, how a sanding machine behaves on a site-built floor versus a parquet floor, and what coating will hold up under heavy use. I have seen too many attempts where someone rented a drum sander from a tool shop and ended up with a wavy surface that only looked flat from a distance.
Assessing the Floor Before Any Work Begins
The first step in any serious restoration is a thorough inspection. You need to check for loose boards, protruding nails, gaps that have opened up between planks, and areas where the wood feels spongy underfoot. A humidity meter is essential here. If the moisture content of the wood is above twelve per cent, you risk the finish peeling later. I always measure the concrete subfloor as well. If there is no damp proof membrane, or if the existing one has failed, moisture can wick up through the floor levelling compound and into the hardwood. That is a problem no amount of sanding will fix.
For gyms that sit on a ground-floor slab, a vapour test using a sheet of polythene taped to the concrete for forty-eight hours will reveal whether the subfloor is dry enough. If moisture is present, you need to address that before anything else. A polyurethane finish will not bond to a damp substrate, and the result will be a cloudy, peeling mess within months.
Choosing the Right Equipment and Abrasives
Not all sanding machines are suitable for a gym floor. A heavy-duty drum sander is fine for a large, open area of site-built floor, but it can be too aggressive on a parquet floor or on engineered wood. For those surfaces, a rotary sanding machine with a flexible disc gives you more control and reduces the risk of damaging the individual blocks. The choice of abrasive matters just as much. I prefer Norton belts for the initial cut because they load less quickly and stay sharp longer. For the final pass before coating, a finer grit from Bona gives a smoother finish that helps the new coating flow out evenly.
Dustless sanding is not a luxury here. In an active gym environment, the dust from sanding contains fine particles of old finish, wood, and whatever else has been tracked across the floor. A dustless sanding system connected to a high-efficiency vacuum keeps the workspace cleaner and reduces the risk of contaminating the new coating. It also makes site safety much easier to manage. No one wants to slip on a layer of sanding dust while moving equipment around.
Repairing Damage Before Sanding
You cannot just sand over damage and hope it disappears. Deep scratches, dents, and areas where the wood has split need to be filled or replaced. A good wood filler mixed to match the existing colour works for small defects, but for larger areas it is often better to cut out the damaged section and fit a new piece of hardwood. I keep a selection of wood stain on hand to adjust the colour of the filler or the new wood so it blends with the surrounding floor. On older gym floors, the wood has often darkened with age, so matching the colour takes some patience.
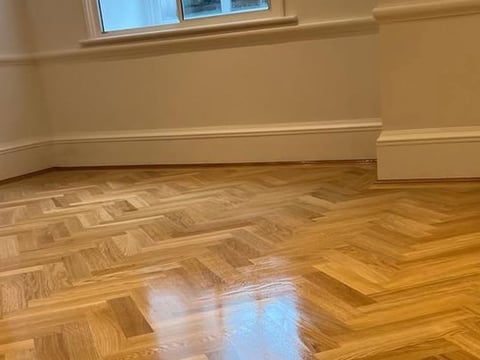
If the floor has a parquet pattern, repairs are more delicate. Pulling up a single block without damaging its neighbours requires a floor scraper and a steady hand. Once the damaged block is out, you clean the adhesive from the subfloor, apply fresh adhesive, and tap the new block into place. Let it cure fully before sanding. Otherwise, the new block will sit slightly proud and cause a trip hazard.
Coating Choices for High-Traffic Gyms
The coating you choose determines how long the restoration lasts. A standard polyurethane finish works well for a dance studio or a yoga space, but a gym floor takes repeated impact from dropped weights, sliding equipment, and foot traffic that never stops. I have had good results with UV-cured coatings for heavy-use areas. These coatings cure under ultraviolet light in seconds, producing a hard, durable surface that resists scratching and chemical damage. The application requires specialised equipment, but the longevity is worth it.
For clients who prefer a more traditional approach, a two-component polyurethane finish applied in multiple thin coats gives excellent durability. The key is to allow full cure time between coats. Rushing this step leads to a finish that looks good for a week and then starts to peel. I always use a Bona roller for applying the finish. It lays down an even coat without bubbles, and the finish dries clear and hard.
The Restoration Process in Practice
A typical gym floor restoration follows a sequence that has worked for me over many years. First, move all equipment out of the area. That sounds obvious, but I have arrived on site to find dumbbells and benches still in place, which adds hours to the job. Second, do a deep clean of the floor to remove any wax, grease, or residue from cleaning products. Third, make all necessary repairs. Fourth, sand the floor in stages, starting with a coarse grit and moving to finer grits. Fifth, vacuum the floor thoroughly and wipe it with a tack cloth to remove every trace of dust. Sixth, apply the primer coat. Seventh, apply the finish coats, sanding lightly between coats if needed. Eighth, allow the finish to cure fully before moving equipment back in.
That last step is where most people go wrong. A polyurethane finish may feel dry to the touch after a few hours, but it is not fully cured for at least seventy-two hours. Putting a heavy leg press on that floor after twenty-four hours will leave permanent marks. I advise gym owners to plan the restoration around a long weekend or a holiday closure so the floor has time to cure properly.
Special Considerations for Different Floor Types
Engineered wood floors are common in newer gyms because they are cheaper and quicker to install. But they cannot be sanded as many times as solid hardwood. The wear layer is thin, usually around two to three millimetres. One aggressive sanding can go right through it. Gym floor restoration on engineered wood requires a lighter touch and a careful assessment of how much material you can safely remove. If the wear layer is too thin, you may need to replace the boards rather than sand them.
Site-built floors, where the hardwood is nailed directly to joists, are more forgiving. You can sand them multiple times over the life of the floor. But they are more prone to movement. Seasonal changes in humidity cause the boards to expand and contract, which can open gaps between them. Before sanding, you may need to fill those gaps with a flexible wood filler that moves with the wood.
Parquet floors add a visual element that many gym owners like, but they present a challenge during restoration. The blocks are small and can lift if the adhesive has degraded over time. I have worked on parquet floors in buildings near Londonderry where the humidity is high year-round, and the blocks were cupping badly. In those cases, we had to remove the floor, install a damp proof membrane, and relay the blocks on a stable subfloor before sanding and coating.
Maintaining a Restored Gym Floor
Once the restoration is complete, the maintenance routine matters. A daily sweep or dust mop removes the grit that acts like sandpaper underfoot. Weekly damp mopping with a neutral cleaner keeps the finish clean without stripping it. Avoid oil-based cleaners and waxes. They build up over time and make the floor slippery. I recommend a Bona cleaning system for gyms because the products are designed to work with the same finishes we apply.
Place mats at every entrance to catch dirt and moisture from outside. That simple step can double the life of the finish. And if a scratch appears, do not ignore it. A small repair now is much cheaper than another full restoration later.
Gym floor restoration is a specialised trade. It combines knowledge of wood, finishes, adhesives, and the specific demands of a high-traffic environment. When done right, a restored hardwood floor can last another decade or more, supporting the activity that takes place on it every day. When done wrong, it is a costly mistake that leaves the gym owner with a floor that looks worse than when they started. That is why I always tell clients to invest in the process, not just the price tag.